How to update the DNS settings on your iPhone iMore
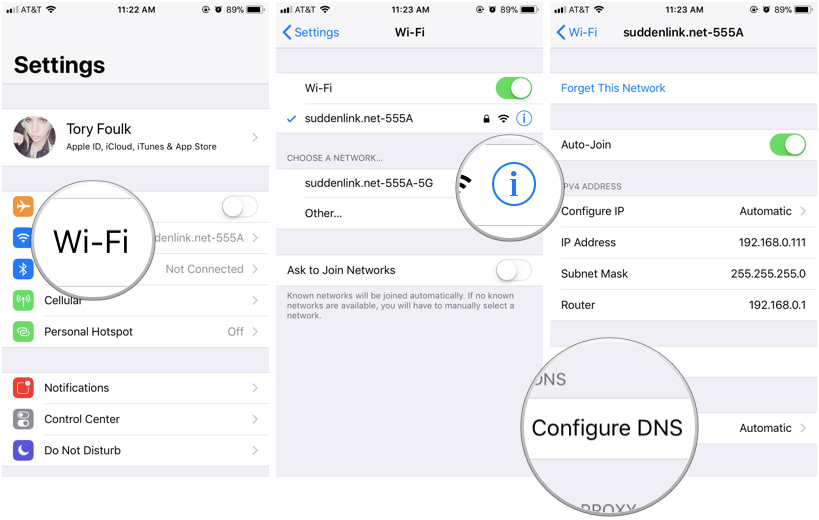
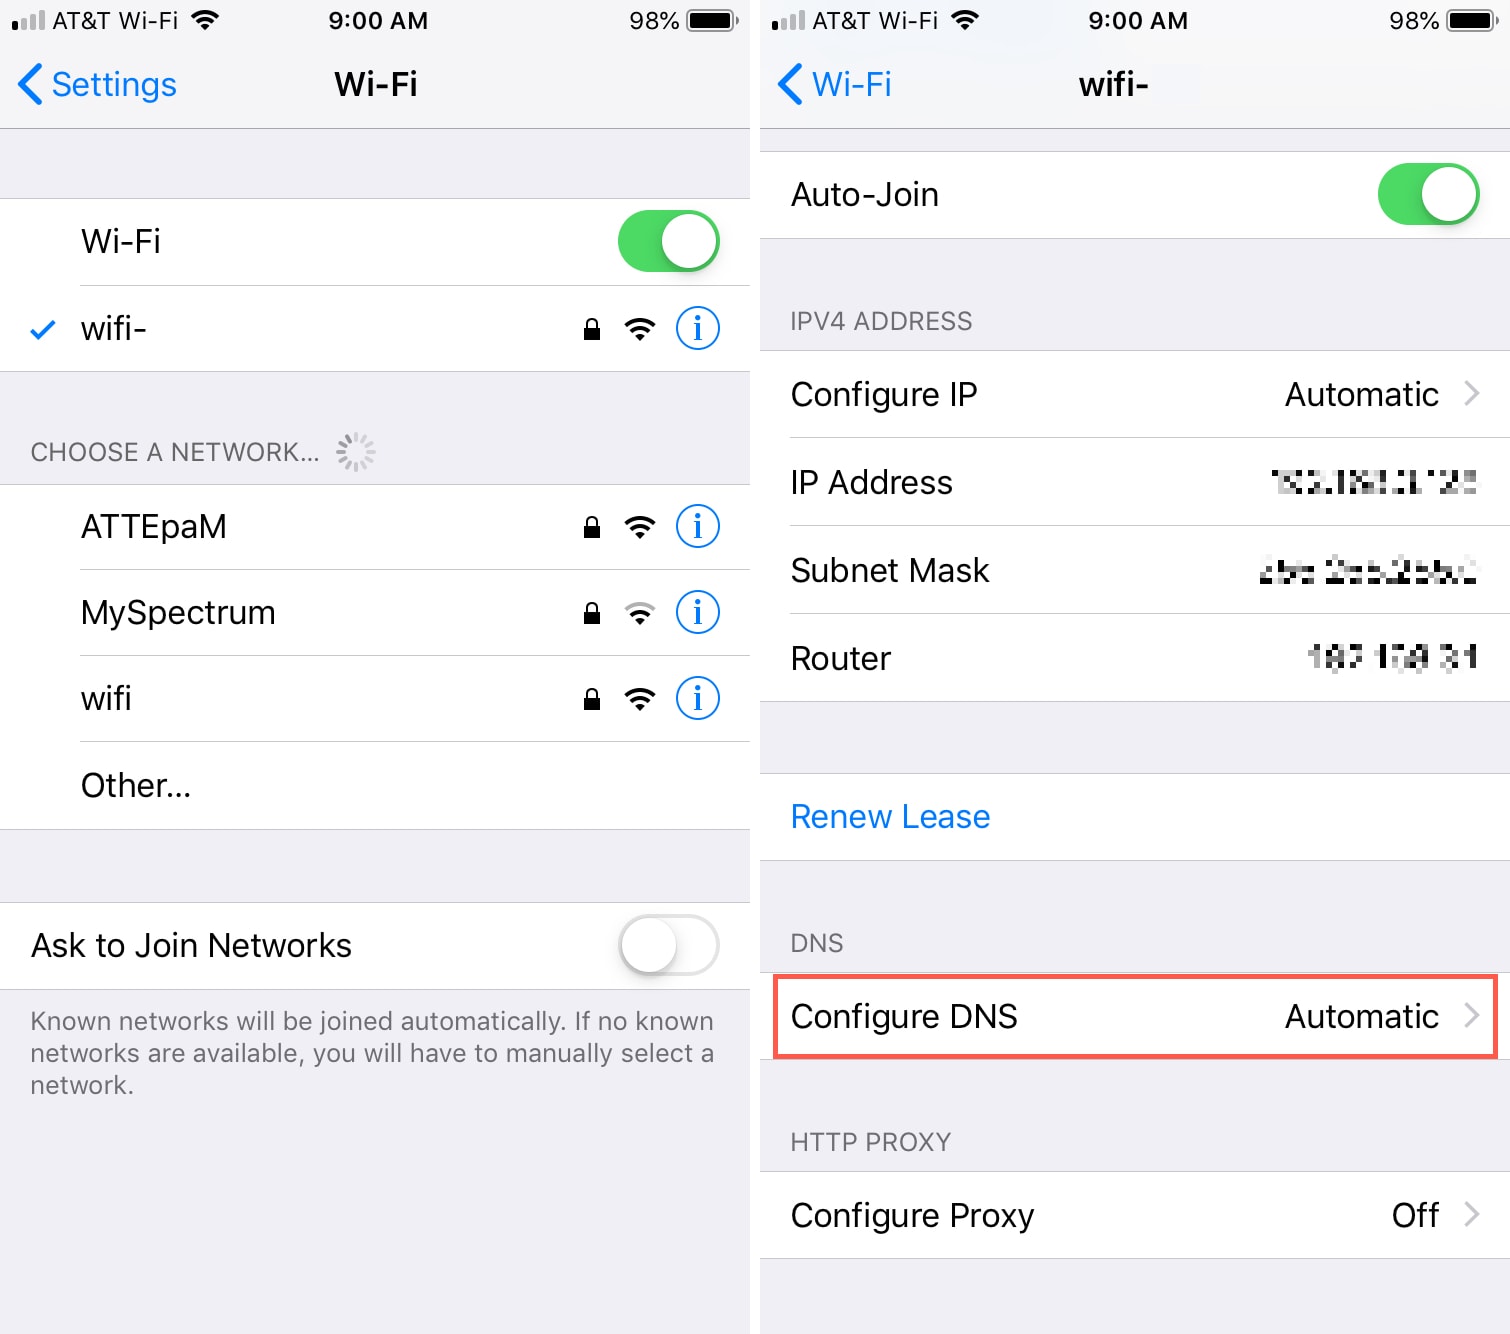
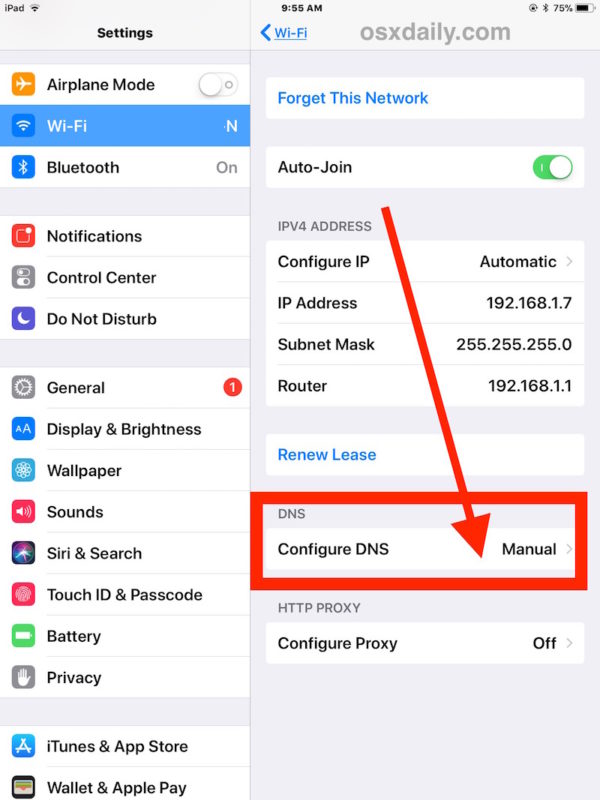
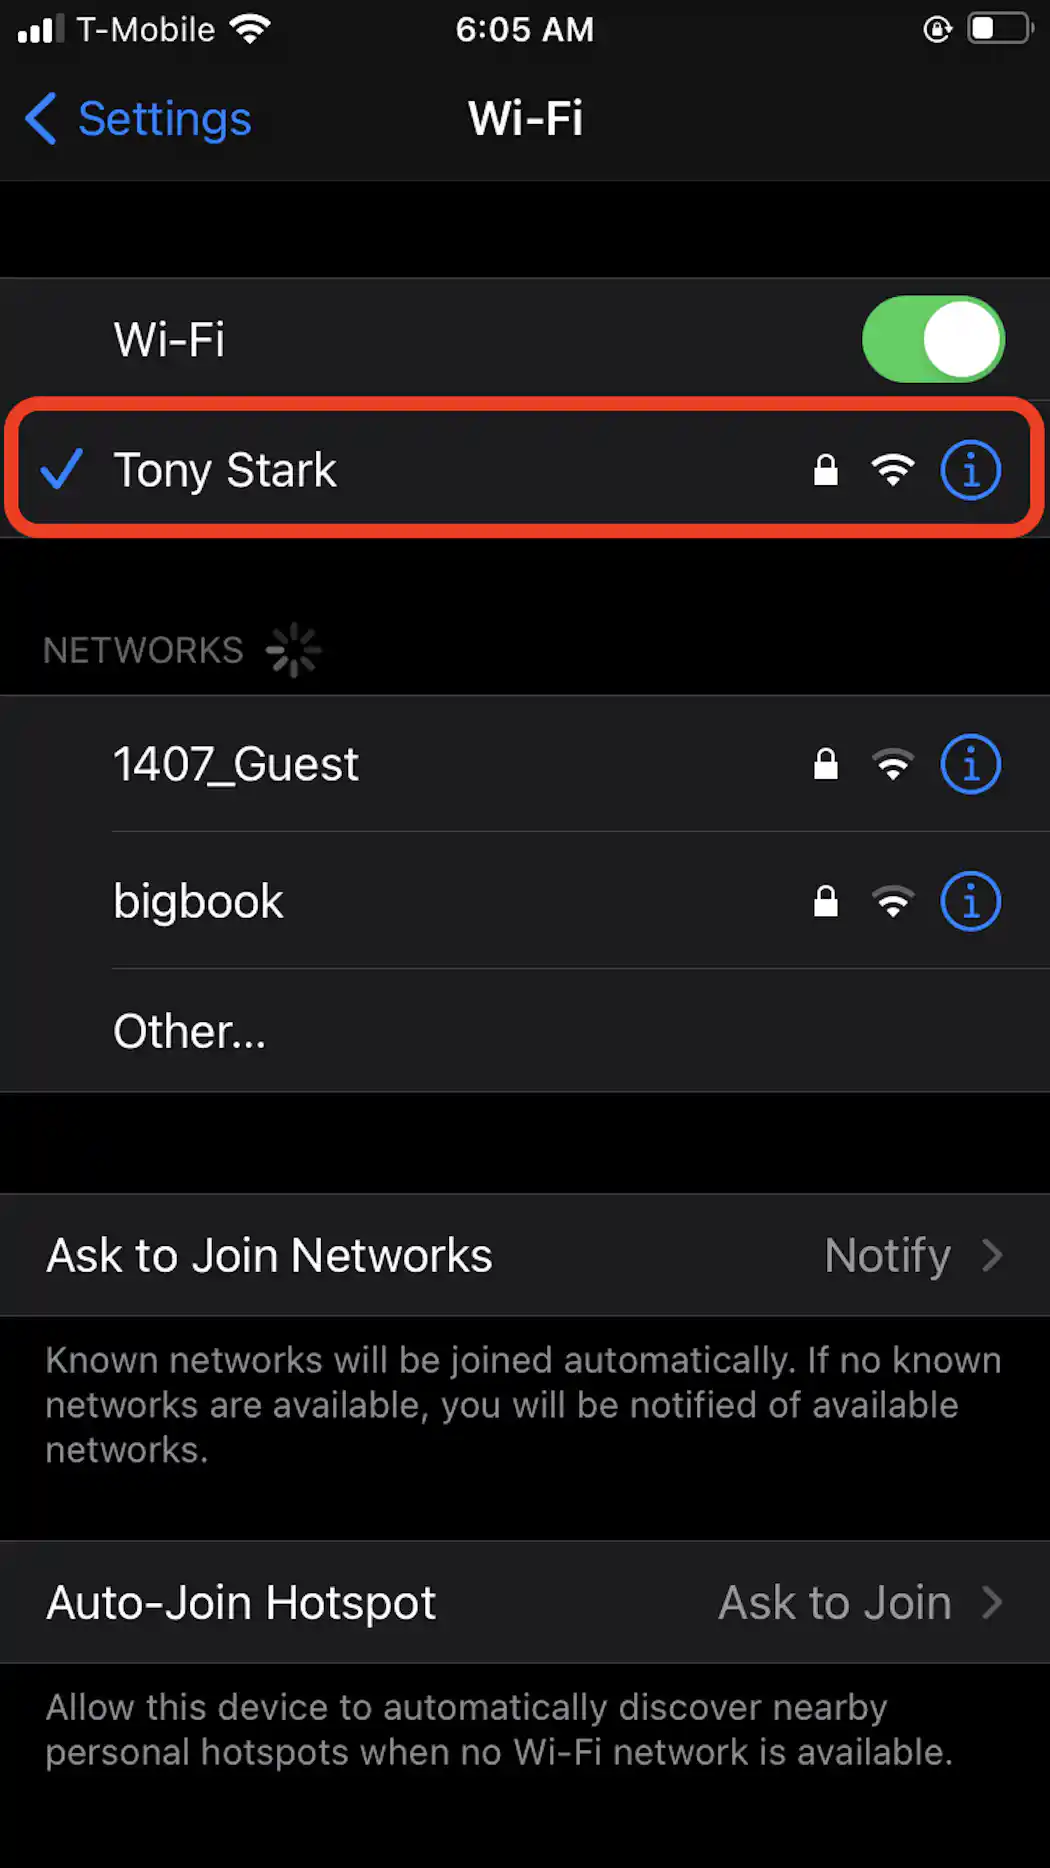
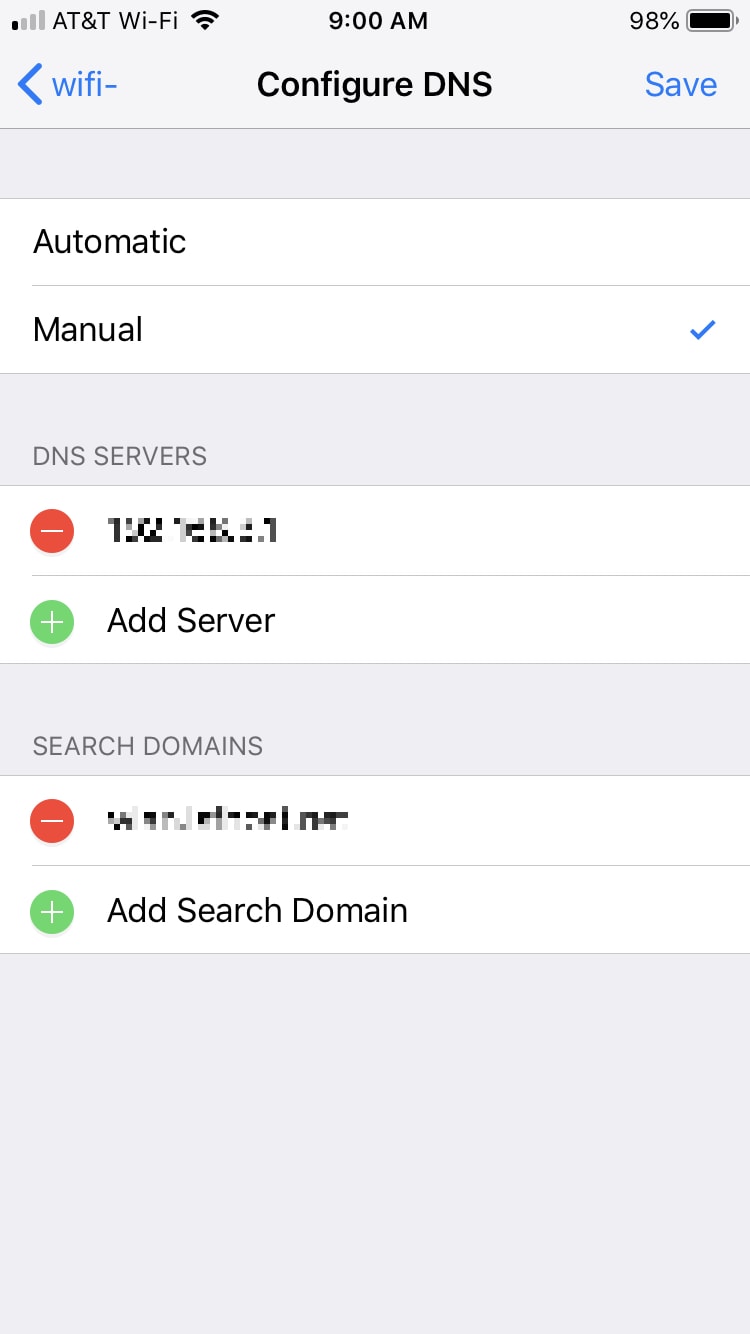
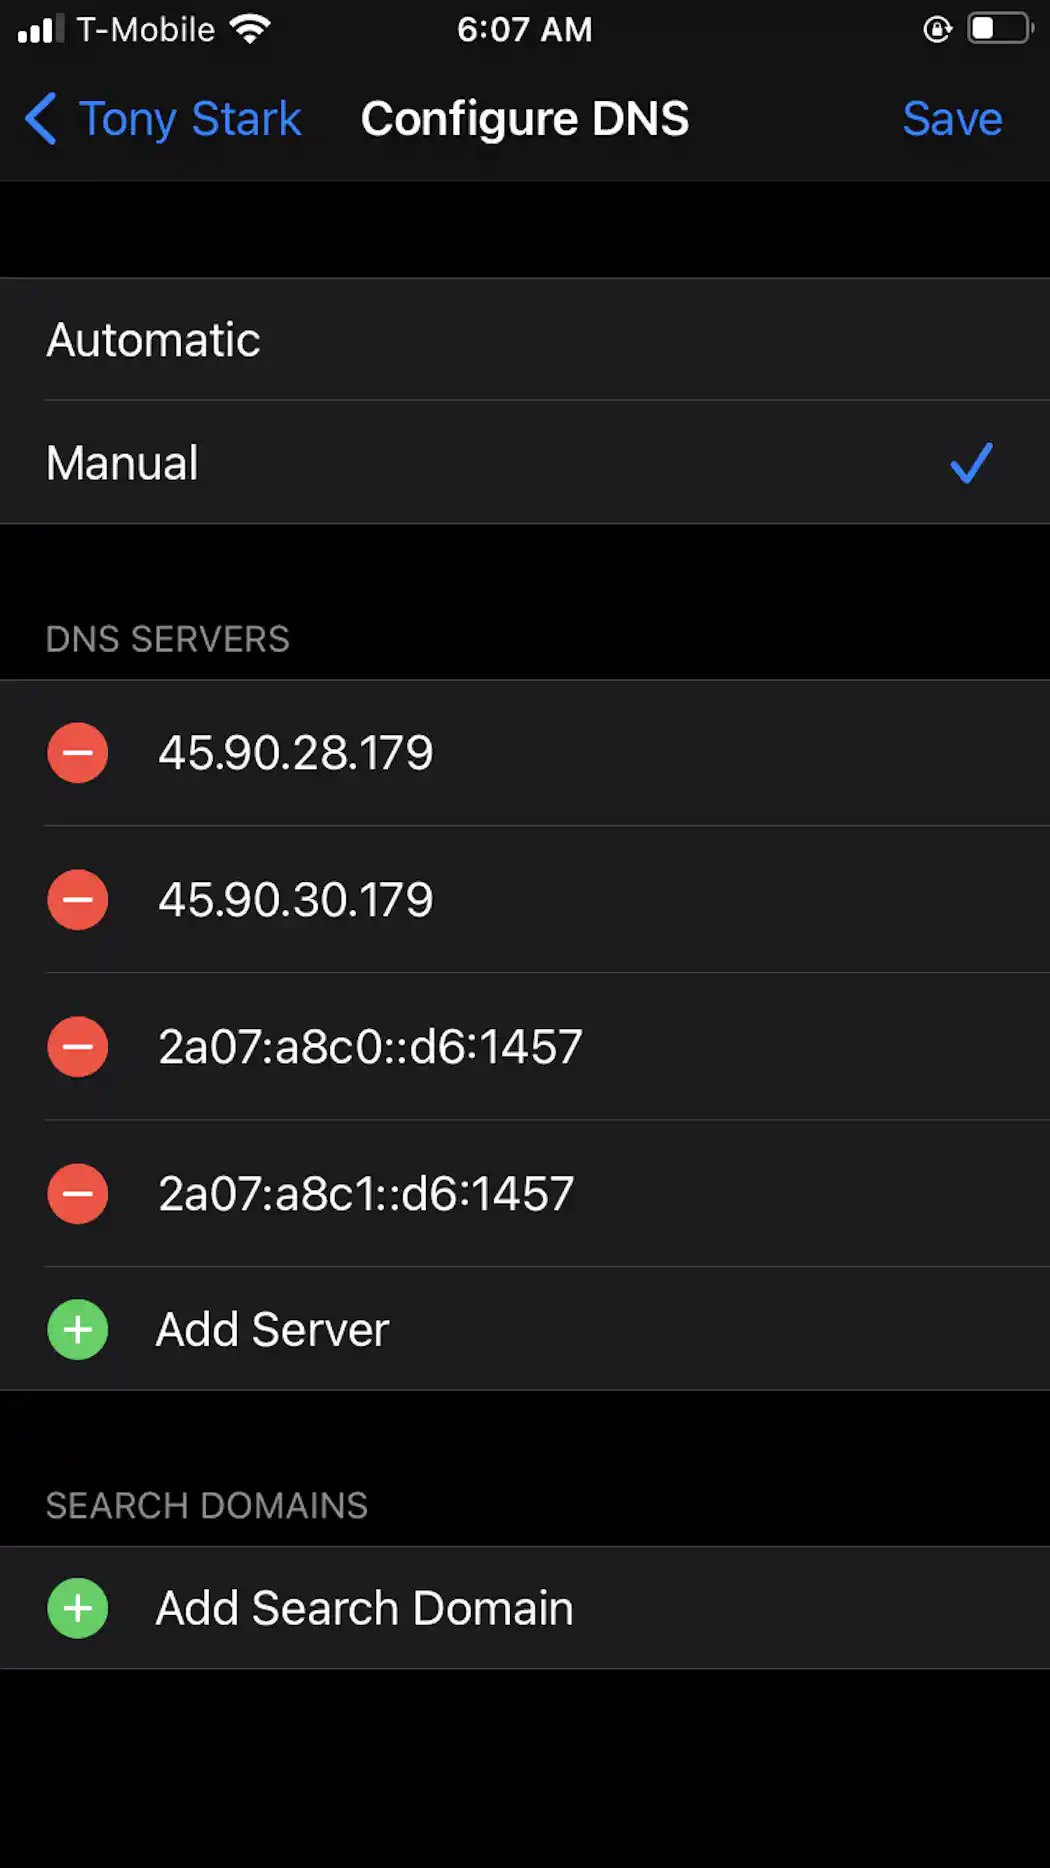
Launch Settings from your home screen. Tap Wi-Fi to open your Wi-Fi options. Next to your selected Wi-Fi network, tap the small "i" icon to open up that network's information. Underneath DNS, tap Configure DNS. At the top of the DNS configuration screen, you should see that Automatic is selected. Tap Manual to make manual changes instead.
How to change DNS on iPhone YouTube
Under "DNS Servers" tap on "Add Server" and enter the following IP address: 1.1.1.1. Tap on "Add Server" again and enter the following IP address: 1.0.0.1. Tap on "Save" to keep the Cloudflare DNS settings. Exit out of Settings and use the internet on your iPhone or iPad as usual. The DNS settings change should take effect.
Cómo cambiar la configuración de DNS en iPhone y iPad conpilar.es
Learn how you can change the DNS used by your iPhone on the iPhone 13 / iPhone 13 Pro.You can use open DN's or Google DNS or cloud flares dns.Gears I use:iPh.

Why and how to use custom DNS settings on your iPhone, iPad, and Mac
Sometimes your iPhone will display a warning under Settings > Wi-Fi which claims that "This network is blocking encrypted DNS traffic" and states that the sites you visit may not be entirely private. This is because your iPhone will fall back on unencrypted DNS traffic, which may be monitored by other devices on the same network.
iPhone DNS Ayarları iPhone DNS Değiştirme DNS Programı Mustafa
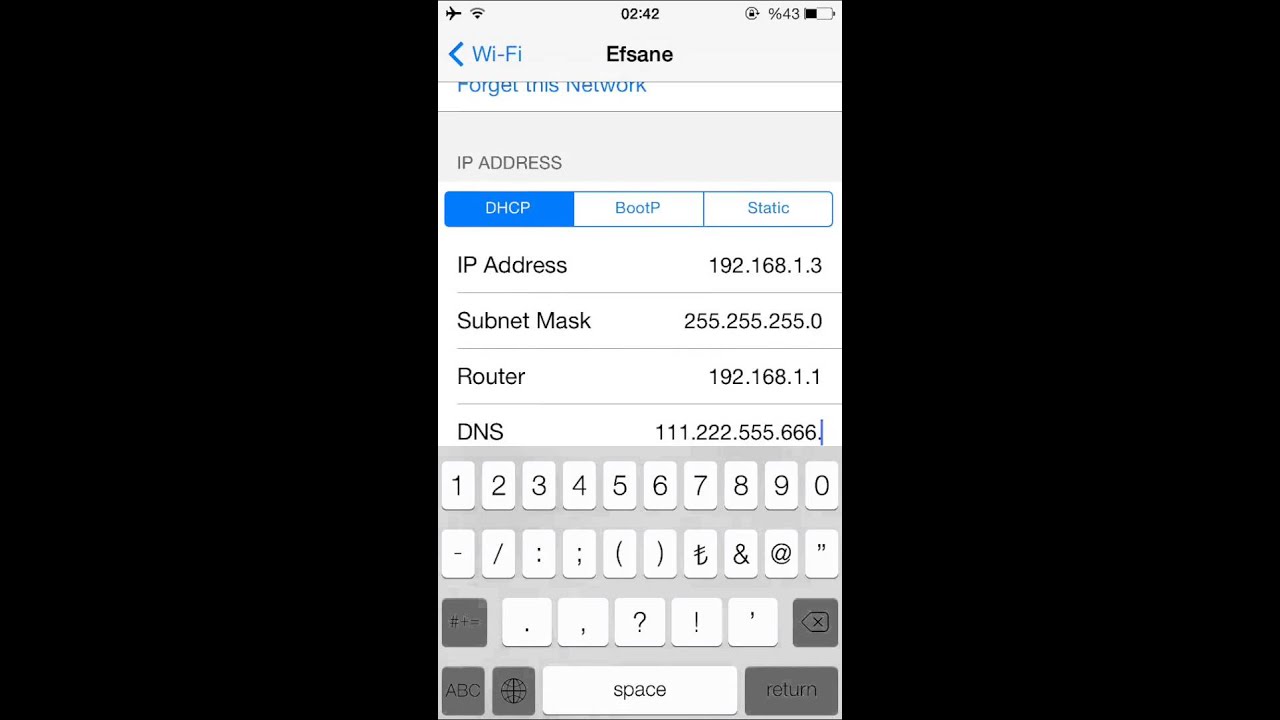
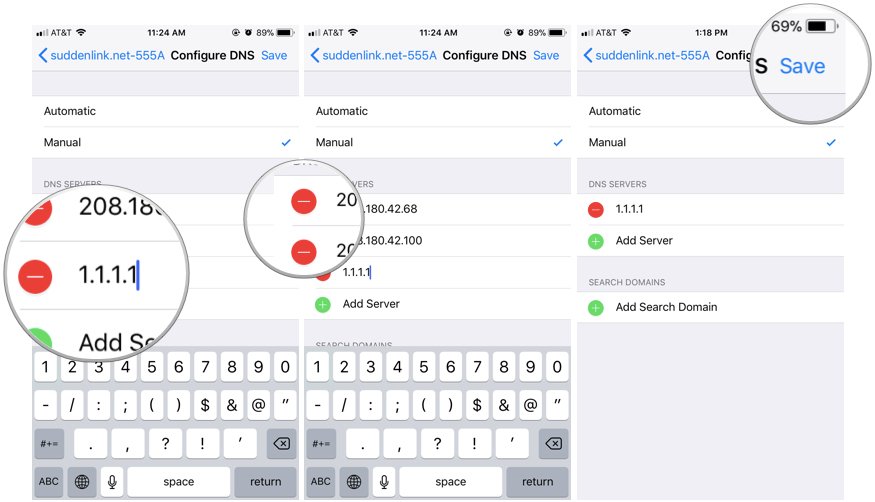
From the iPhone's home screen, tap Settings. Tap Wi-Fi. The available wireless networks in range of your iPhone appear, as shown below. Tap the connected Wi-Fi network. The window shown below appears. Tap Configure DNS. Tap Manual. Delete the current DNS servers and enter the new DNS servers.

How to Use the Fast & Private CloudFlare DNS on iPhone or iPad
To do it, you will need to follow these steps. First of all, Go to Settings on your iPhone. Then, Go to WiFi, Turn it on and connect to a zone. Now, Tap on the exclamatory sign next to the Wi-Fi zone name. It will lead you to a new setting page where you will find many options. Just find Configure DNS and tap on it.
Why and how to change DNS settings on iPhone, iPad, Mac
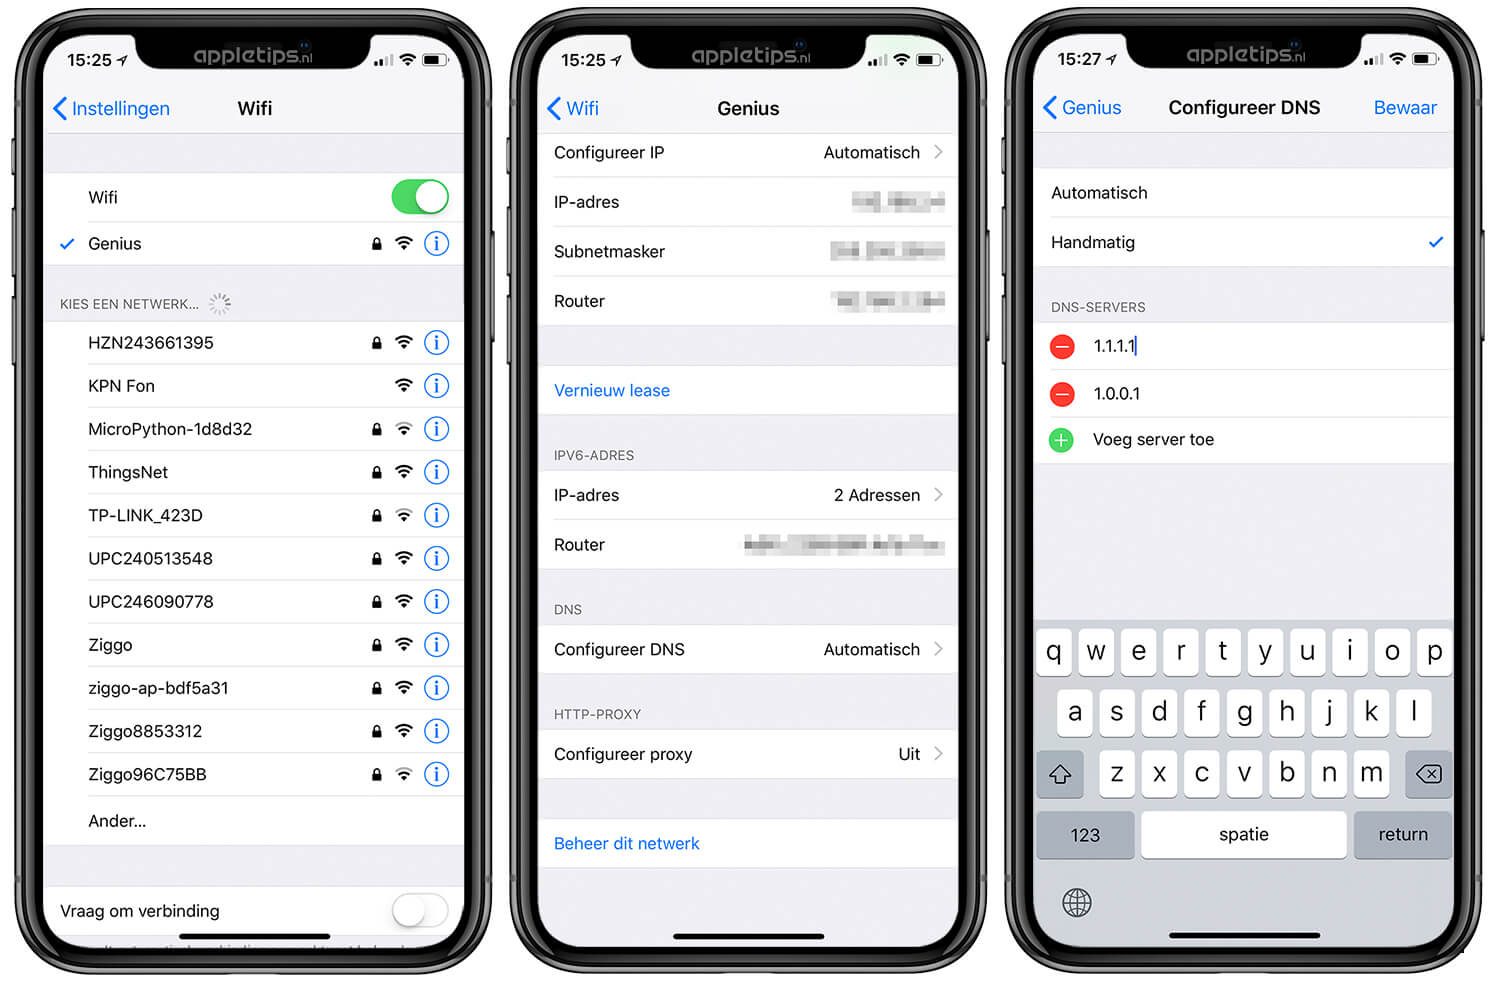
Go to Settings > Wi-Fi. Select the 'i' icon next to the Wi-Fi network you are connected to. Scroll down and select Configure DNS. Change the configuration from Automatic to Manual. Select Add Server. Depending on what you want to configure, choose one of the following DNS addresses for IPv4: Use 1.1.1.1 resolver.
How to Use the Fast & Private CloudFlare DNS on iPhone or iPad
On your iPhone, go to the WiFi Settings section. Find the Proxy option and ensure that it is set to Auto. Next, input the DNS bypass code - "https://nick/my_name" in the textbox shown on the screen. Here "my_name" is the nickname of the user, so be sure to use a unique one without spaces.
How to Change Your iPhone's DNS Servers Macinstruct
Changing DNS settings on your iPhone can be done easily with the help of the 1.1.1.1: Faster Internet app. This app provides a user-friendly interface to configure your phone's DNS settings, offering faster and more secure internet browsing. Here's how you can use the app to change DNS settings on your iPhone:
Why and how to change DNS settings on iPhone, iPad, Mac
You can manually configure the DNS servers in your iOS settings. Here is how: Open Settings; Tap on Wi-Fi. If it's switched off, turn it on; Pick a Wi-Fi network and tap on the blue i icon; Tap Configure DNS and select Manual; Tap Add Server and add these DNS addresses: 103.86.96.100.

Change Your DNS Settings on iPhone, iPod Touch, and iPad Techinch
1. Open Settings on your iPhone and tap on WiFi. 2. On the WiFi Screen, tap on the "i" icon located next to your WiFi Network Name (See image below) 3. On the next screen, scroll down and tap on Configure DNS option (See image below) 4. On the next screen, select the Manual option and tap on +Add Server. 5.
How to Change Your iPhone's DNS Servers Macinstruct
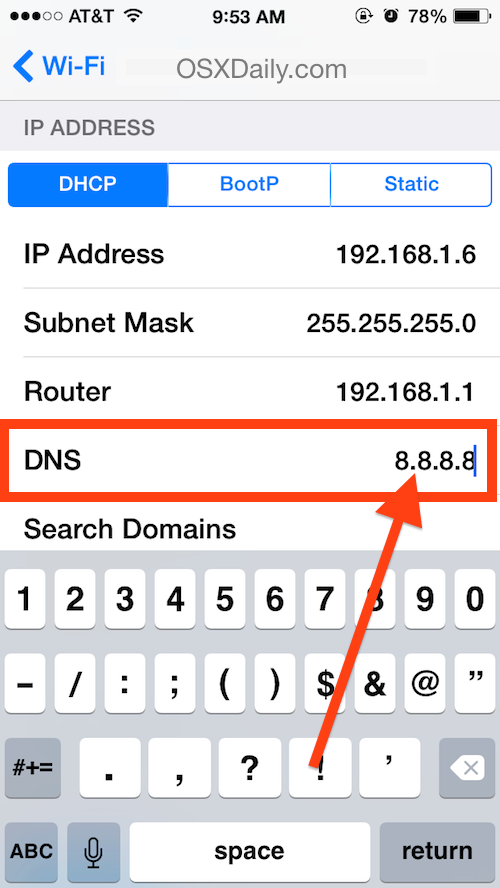
You can manually change your DNS server on iOS by going to Settings > Wi-Fi. Tap on the blue "i" icon next to your Wi-Fi network, then scroll down and tap Configure DNS . On macOS you'll.
How to update the DNS settings on your iPhone iMore
Click 1.1.1.1 at the top of the app. Turn on the DNS Override toggle. DNS Override may ask you to install their VPN profile so that they can automatically update DNS settings. Lastly, wifi users can setup DNS servers manually by going to the iOS wifi settings.
DNS wijzigen op een iPhone, iPad en Mac appletips
Wi-Fi: Changing DNS details. Enter the Settings app on your iOS device, and select Wi-Fi. Tap the small "i" icon next to the name of the network that needs the DNS server details changed, scroll.
Why and how to use custom DNS settings on your iPhone, iPad, and Mac
On your iOS device, open Settings. Tap Wi-Fi. Tap the i icon next to the Wi-Fi network you want to change DNS servers for. Tap DNS. Now remove the existing DNS servers and key in DNS server addresses of your choice. You just need to separate the primary server and alternate server with a comma.

HOW TO Configure DNS on iPhone & iOS YouTube
Supply: iPhone; Notes: To select and use the Open DNS servers, you may enter 208.67.222.222 and 208.67.220.220 To select and use the Google DNS servers, you may enter 8.8.8.8 and 8.8.4.4. READ MORE - Free way to convert PDF to word on iPhone iOS night mode filters blue light to improve your Sleep